Diary 01 Daily lifeSmart home
Install Home Assistant on a Raspberry Pi
You want to try Home Assistant, and you have a Raspberry Pi to run it on. The easiest way to run Home Assistant is Home Assistant OS on a Raspberry Pi 5 or 4 with at least 2 GB of RAM. Write the image to a 32 GB or larger SD card with Raspberry Pi Imager. Plug the Pi into your router with an Ethernet cable and power it up. A few minutes later, open http://homeassistant.local:8123 to finish setup.
What you need
- A Raspberry Pi 5 or 4 (2 GB RAM or more) and its official power supply. A weak power supply causes most of the random crashes people blame on Home Assistant. I’d buy the official one. It’s the least exciting part of any smart home, and it matters more than it looks.
- A 32 GB or larger microSD card, ideally an A2-rated one. An SSD is even better (see below).
- An Ethernet cable for the first boot.
- A computer to write the card.
Home Assistant has dropped support for 32-bit systems. So if you want to reuse a Raspberry Pi 3, check the current installation page first.
1. Write Home Assistant OS to the card
- Install Raspberry Pi Imager from raspberrypi.com and open it.
- Under Device, choose your Pi model.
- Under Operating system, choose Other specific-purpose OS → Home assistants and home automation → Home Assistant. Then pick the Home Assistant OS image for your model.
- Under Storage, choose the SD card and write it. This erases everything on the card.
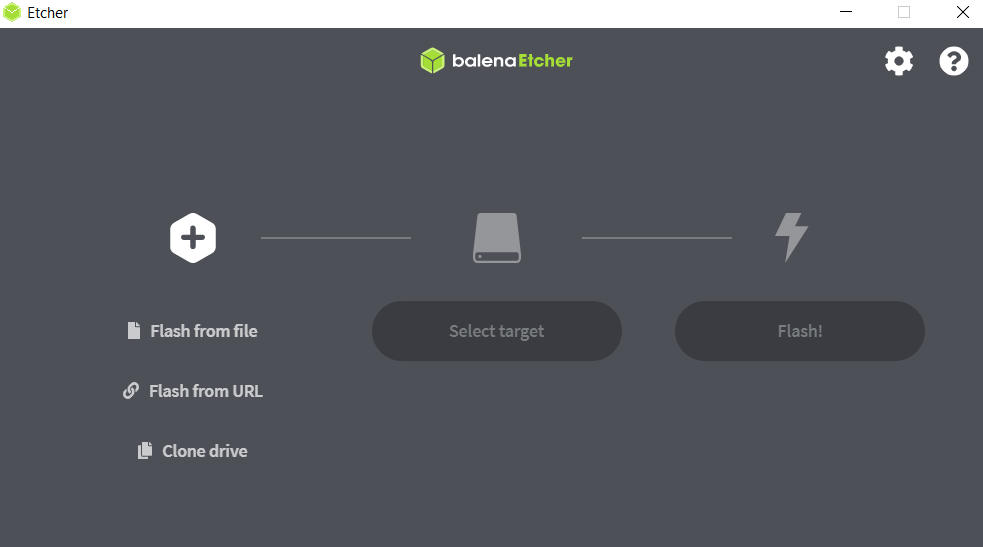
Imager downloads the right image for you. You may prefer another tool, such as balenaEtcher. In that case, download the image for your board from the Home Assistant installation page and flash that file instead.
2. First boot
Put the card in the Pi, connect Ethernet, then power it on. The first boot needs a wired connection to download the rest of the system. You can set up Wi-Fi later from inside Home Assistant.
On a computer on the same network, open http://homeassistant.local:8123. Some routers and Windows machines don’t support that name. If it doesn’t work, find the Pi’s IP address in your router’s list of connected devices. Then use http://192.168.x.x:8123.
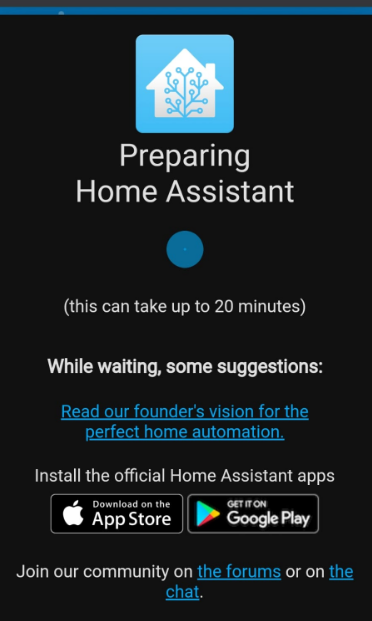
You’ll see a “Preparing Home Assistant” screen while it finishes installing. This can take a while on the first boot. It’s a good time to make a cup of tea. The Pi doesn’t need you to watch.
3. Onboarding
When it’s ready, create the owner account. Set your home location, which is used for sunrise and sunset automations and the weather. Choose your units, and decide if you want to share anonymous analytics.
Home Assistant then scans the network and offers to add devices it found, such as smart TVs, speakers and printers. The list is often longer than you’d expect. Houses tend to collect gadgets. Add the ones you want now, or later from Settings → Devices & services.
4. Set up backups on day one
If you only remember one step, make it this one. SD cards wear out. If a card fails and you have no backup, you start again. Go to Settings → System → Backups and turn on automatic backups. Keep the encryption key somewhere safe, because you need it to restore.
Send copies off the Pi, to a network share or to Home Assistant Cloud if you subscribe. A backup that only lives on the same SD card won’t help when the card dies.
Boot from an SSD for better storage
Home Assistant writes to its database all the time, and that’s hard on SD cards. It’s like writing and erasing on the same page of a notebook all day. In the end, the paper wears through. A small SSD over USB 3 is faster and far more reliable. So is an NVMe drive on a Raspberry Pi 5 with an M.2 adapter. If you plan to keep Home Assistant running long term, I’d start on an SSD.
Write the same image to the SSD with Imager and boot from it. Recent Pi firmware boots from USB and NVMe without changes. If you stay on SD, keep less history in the recorder to reduce wear.
Next steps
- Install the Home Assistant app on your phone for presence detection and notifications.
- Add a Zigbee or Thread USB dongle. It lets you connect sensors and bulbs without their cloud hubs.
- Keep Home Assistant updated from Settings → System → Updates. Read the release notes, because breaking changes are listed there.
- For access away from home, use Home Assistant Cloud or a VPN. I’d avoid opening port 8123 on your router.
I’d start small. Add one or two devices and a simple automation, then build from there. Your house doesn’t have to be smart by the weekend. One automation that works every day beats ten that work sometimes.

Comments
No comments yet. Questions, fixes and better ways are all welcome.