You’re copying files to the server by hand, and every deploy feels risky. Deployer is a command-line deployment tool written in PHP. You describe your servers and steps in a deploy.php file. Then dep deploy builds each release in its own folder on the server.
When the release is ready, it switches a current symlink to it in one step. A symlink is a shortcut that points to another folder. So visitors never see a half-updated site. If a release goes wrong, dep rollback points the symlink back to the previous one.
Why use it?
- No downtime. Code is uploaded and dependencies installed before the switch.
- Rollbacks. The last few releases stay on the server, ready to swap back.
- Recipes. Ready-made steps for Laravel, Symfony, WordPress, Magento, Drupal and more.
- It’s just PHP. Your deploy script is PHP, kept in version control with the project, and it runs over plain SSH. So there’s no new language to learn, only one new file.
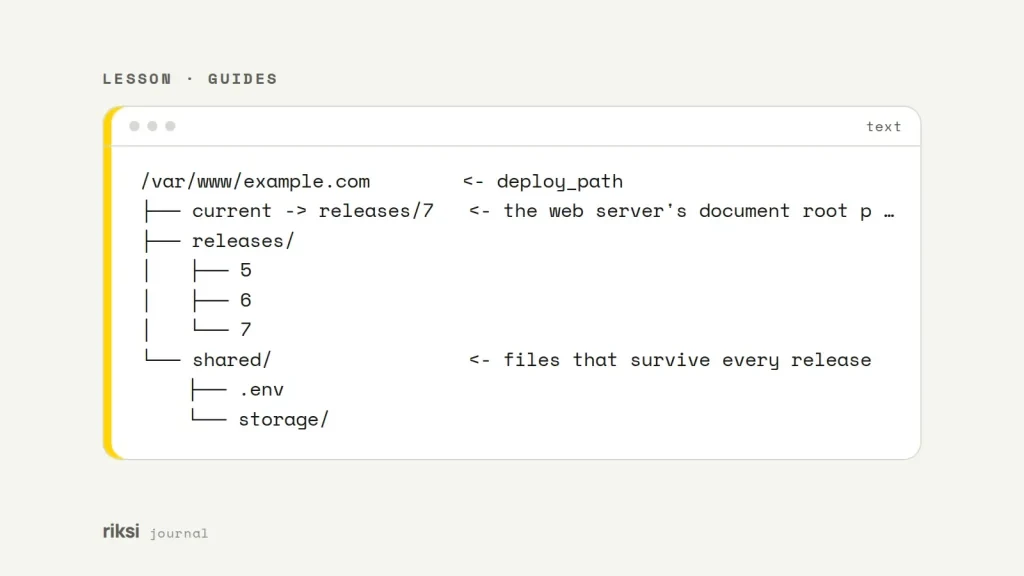
How releases are laid out
/var/www/example.com        <- deploy_path
├── current -> releases/7   <- the web server's document root points here
├── releases/
│   ├── 5
│   ├── 6
│   └── 7
└── shared/                 <- files that survive every release
    ├── .env
    └── storage/
Point the web server at current (or current/public for Laravel). Think of the current link as a signpost. The releases stay where they are, and only the signpost turns. Files that must stay between releases, such as .env, uploads and logs, live in shared. They’re symlinked into each release.
Install it
composer require --dev deployer/deployer
vendor/bin/dep --version
I install it per project, so the version is pinned with the code. The current major version is 8. If you follow older tutorials, my advice is to check the setting names against the documentation for your version. Tutorials don’t update themselves when a tool does.
Create deploy.php
vendor/bin/dep init asks a few questions and writes a starting file. You can change every answer later, because they all end up in that file. Here is a Laravel example.
<?php
namespace Deployer;

require 'recipe/laravel.php';

set( 'application', 'example' );
set( 'repository', '[email protected]:example/site.git' );
set( 'keep_releases', 5 );

// The Laravel recipe already shares .env and storage/. Add anything else:
add( 'shared_dirs', [ 'public/uploads' ] );

host( 'example.com' )
    ->set( 'remote_user', 'deploy' )
    ->set( 'deploy_path', '/var/www/example.com' );

after( 'deploy:failed', 'deploy:unlock' );
The recipe brings the standard steps. It clones the repository into a new release and links shared files. It runs composer install, runs migrations and clears caches. Then it switches current.
For WordPress, recipe/wordpress.php shares wp-config.php and the uploads folder instead.
Before the first deploy
I’d check these three things first.
- You can log in to the server with an SSH key as the
remote_user. - The server can read the repository, usually with a read-only deploy key added to GitHub or GitLab.
- PHP, Composer and Git are installed on the server. On a fresh Ubuntu server,
dep provisioncan set these up for you.
Deploy and roll back
vendor/bin/dep deploy            # build a new release and switch to it
vendor/bin/dep releases          # list releases on the server
vendor/bin/dep rollback          # switch current back to the previous release
vendor/bin/dep ssh               # open a shell in the current release
The first deploy creates the folder structure. After it, put the real .env into shared/.
If a deploy fails part-way, the live site is safe, because current still points at the old release. That’s the part I like most. The half-finished release never gets a single visitor.
Add your own tasks
task( 'build:assets', function () {
    runLocally( 'npm ci && npm run build' );
    upload( 'public/build/', '{{release_path}}/public/build/' );
} );

before( 'deploy:symlink', 'build:assets' );
run() runs a command on the server. runLocally() runs it on your machine, and upload() copies files across. Hooking it before deploy:symlink puts the assets in place before the release goes live.
After that, every deploy and every rollback is one command.
I’d try it on a staging server first. Deploy, roll back and deploy again before you point it at a live site. Rolling back on purpose is much calmer than rolling back in a hurry.


Comments
No comments yet. Questions, fixes and better ways are all welcome.